When water gets into places it doesn’t belong, minutes matter. Floors cup, drywall swells, and hidden cavities trap moisture that can turn into mold. If you’re in Indiana and dealing with a burst pipe, sump-pump failure, or storm intrusion, a professional water damage restoration process follows a clear, proven path. Knowing that path helps you make faster decisions, protect health and property, and move through insurance with less friction. Below is a practical, plain-English walkthrough you can use whether you’re a homeowner in Indianapolis, a facility manager in Fort Wayne, or a landlord near Bloomington.
Step 1: Immediate Safety and Source Control
Pros start with safety. They shut off electricity where standing water is present, confirm structural stability, and stop the water at the source (main shutoff, valve, or appliance line). Expect basic hazard controls like slip signage, cord covers, and containment where needed. If contamination is suspected (sewage or floodwater), technicians use appropriate PPE and isolate the area to keep occupants safe.
Indiana example: Frozen pipe in Carmel? A trained team will secure the area, photograph conditions, and cap the line before anything else.
Step 2: Document for Insurance the Right Way
Before moving a single fan, teams capture wide-angle and close-up photos, moisture readings, and a contents list. You’ll see a digital log that pairs rooms and materials with moisture levels. This record becomes the backbone of your claim, especially in commercial settings that require compliance documentation to reopen quickly.
Tip for office managers: Ask for daily moisture logs and a simple progress note you can forward to leadership.
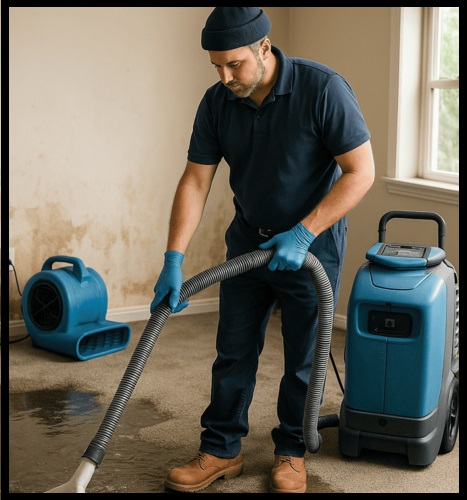
Step 3: Water Extraction and Stabilization
High-capacity pumps and weighted extractors remove the bulk water fast. Then the focus shifts to stabilization: removing unsalvageable materials (wet pad, baseboards, some drywall) to speed drying and prevent secondary damage. Crews may set up containment to focus airflow and reduce energy use.
For basements common in Indianapolis and South Bend, technicians also check floor drains, sump systems, and adjacent storage areas to prevent re-wetting.
Step 4: Strategic Drying and Dehumidification
Drying isn’t guesswork. A reputable water damage restoration service designs an airflow plan and places dehumidifiers to hit target humidity quickly. They monitor materials (drywall, subfloor, framing, cabinets) with meters each day and adjust equipment so you’re not over- or under-drying. Expect daily check-ins until materials reach dry standards.
Real-world example: A sprinkler discharge in a Greenwood clinic might start with 24 hours of aggressive dehumidification in treatment rooms, then taper equipment as readings normalize so the business can reopen sooner.
Step 5: Cleaning, Sanitation, and Odor Control
After drying, surfaces are cleaned and treated per the material and category of water. Antimicrobial treatments may be applied where appropriate. HVAC returns are inspected, especially in multi-unit buildings where stack leaks can carry moisture through shafts. Odor control can include HEPA air filtration and targeted treatments so spaces are usable again without lingering smells.
Step 6: Repair Planning and Clear Closeout
A good team provides a transparent repair scope. You should see line-item estimates, code notes, and a realistic timeline. For landlords and property managers, this includes unit turn scheduling and photo documentation to protect rent continuity. For schools and churches, expect after-hours or phased work to keep programs running.
If you’re in North Indianapolis and want to see a local service footprint or learn more about process expectations, review the service details here:Steamatic of North Indianapolis.
Who This Process Serves Best in Indiana:
Homeowners with basements (Indy, Fort Wayne, South Bend): fast dry-outs, sump-pump checks, and moisture logs to prevent mold later.
Small businesses and clinics: documented mitigation to meet compliance and reopen quickly.
Landlords and HOAs: scalable crews, single point of contact, and daily readings across multiple units.
Schools, churches, and gyms: safe containment, floor protection plans, and after-hours scheduling.
If you live or manage property around Marion or Hamilton counties, here’s a straightforward starting point to understand local response times and availability:North Indy service information.
How to Choose Among Water Restoration Companies,
Not all water restoration companies operate the same way. Look for:
- Written safety procedures and proof of training for technicians
- Daily moisture logs you can share with insurers or leadership
- A clear demolition limit (remove only what helps drying)
- HVAC and crawl-space evaluation when basements or older homes are involved
- A single, accountable project lead you can reach quickly
Common Scenarios and What Good Looks Like:
Frozen or burst pipe (Carmel, Zionsville): same-day extraction, strategic drywall cuts, and cabinet toe-kick ventilation to save finishes where possible.
Sump-pump failure (Greenwood, Southport): redundancy recommendations, contents elevation, and a plan to reduce future risk.
Restroom overflow in retail/restaurant (Fishers, Noblesville): containment for public safety, sanitation per category of water, and slip-hazard mitigation.
The Role of a Water Remediation Company vs. General Contractors:
A specialized water remediation company handles mitigation: stopping the source, drying, cleaning, and clearing moisture to dry standards. General contractors typically take over for rebuilds. In many jobs, mitigation quality determines repair speed. Clean data and proper drying mean fewer surprises during reconstruction.
FAQs: Water Damage Restoration:
Q1. How long does drying usually take?
Most residential jobs dry in 2–5 days, depending on materials, temperature, and how quickly extraction began. Daily readings guide equipment adjustments.
Q2. Will my insurance cover this?
It depends on your policy and cause. Mitigation firms document conditions, provide estimates, and share moisture logs to support your claim. Sudden, accidental events are often covered; long-term leaks may not be.
Q3. Do I need to remove drywall?
Not always. Targeted “flood cuts” at 2–24 inches help airflow behind walls when insulation or saturated cavities are present. The goal is to remove only what is necessary to dry the structure correctly.
Q4. What can I do in the first hour?
Shut off the water if safe, move valuables and electronics out of the wet area, and avoid walking on saturated carpet where there’s a risk of electrical contact. Call mitigation early to limit secondary damage.
Final Checklist:
Confirm the area is safe before re-entry
Stop the source and protect high-value items
Ask providers for photos, moisture logs, and a daily plan
Approve only the demolition that speeds drying
Get a clear repair scope and timeline before closeout